Wednesday, February 29, 2012

OPI Jade Is The New Black VS Don't Mess With OPI

Hey guys!

Today I have a comparison between OPI's Jade Is The New Black and Don't Mess With OPI.  To me these two colors are nearly identical, but equally pretty!


On the left, Don't Mess With OPI.  On the right, Jade Is The New Black
Jade Is The New Black is from the Spring 2010 Hong Kong Collection.  JITNB is a jade green creme with blue undertones.  Don't Mess With OPI is from the Spring/Summer 2011 Texas Collection.  DMWOPI is a forest green creme.  When I first saw the Texas Collection in person, I decided not to buy DMWOPI because it was so similiar to JITNB.  However, I recently spotted DMWOPI hiding at JCP's Salon, and it was on clearance for $4.25!  So I decided to pick it up and do a comparison.  Below is a picture with 2 coats of both colors.

As far as being dupes, there are some slight differences.  JITNB is a little bit darker, while DMWOPI is a little more sheer.  Formula was a little different also.  JITNB applied more smoothly and had better coverage.  DMWOPI was a little more sheer, so it showed the ridges in my nail more.  I also had some bald spots with DMWOPI that would probably require a third coat.  Here is a shot of each color on its own with 2 coats.

OPI Don't Mess With OPI

OPI Jade Is The New Black
If I had to choose between the 2, I think I perfer JISTNB.  Application was smoother, I prefer the darker color and the polish dries more glossy than DMWOPI.  You probably don't need both polishes in your colleciton unless you love greens.  Or unless you find a great deal on one of them!

Thanks for stopping by!

K


Pin It

Tuesday, February 28, 2012

China Glaze CG In The City

Hey guys!


I have a really quick post today.  Below is China Glaze CG In The City from the Fall 2011 Metro Collection.

China Glaze CG In The City
w/flash

artificial light
no flash
CG In The City is a dusty purple base with blue, bronze and silver multi-tonal glitter.  This applied wonderfully.  It is really sheer though so I had to use 4 coats to get decent coverage.  Even with 4 coats it didn't get too thick or goopy.  Overall a wonderful polish!

Thanks for stopping by!

K


Pin It

Polish Stash Update

Hey guys!

I've been spending some time organizing my nail polish and trying to figure out how to share my stash with you.  So I've decided to make up a spreadsheet and post it under the "Stash" tab.  Here you'll be able to see my entire collection.  I will have the brand of polish, the polish name, the name and season of the collection, the polish number, and a short color summary.  I have also decided that whenever I don't have a new polish or nail art to show, I'll just show a different color from my collection and add a link to the post on the spreadsheet.   This will definitely help keep me organized, and will be a great resource for myself and hopefully for you.  My stash is a work in progress, so it's not as amazing as alot of nail bloggers.  But I'm proud of it, and I enjoy adding to it.  I'm hoping to get the "Stash" tap completed in the next couple of days!

Thanks for stopping by!

K
Pin It

Wednesday, February 22, 2012

"True" Leopard Print Mani

Hey guys!

I stared at my stash for about 10 minutes tonight trying to decide what to do!  I don't really have many new polishes right now (I'm holding out for the Hunger Games collection!) so I decided to get out my animal print stamps and do a "true" leopard print mani.  I love doing leopard print with fun colors, but I thought this would be a nice change.  For this mani I used China Glaze Knotty for the base, OPI I Brake For Manicures for stamping on the spots, and OPI Warm & Fozzie and OPI Glitzerland to fill in the spots.  This is what I came up with!


Thanks for stopping by!

K

Pin It

Tuesday, February 21, 2012

Nicole by OPI Follow Me On Glitter Swatch and Comparison

Hey guys!

So I finally broke down and picked up some of the Kardashian polishes for Nicole by OPI.  I have to admit some of the colors are pretty amazing.  Today I have Follow Me On Glitter.  As soon as I got home I went through my stash looking for dupes.  Since I tend to go for darker glitters, I thought I'd have a ton.  To my surprise I only had one true dupe in my collection! 


Follow Me On Glitter w/Konad Zebra print stamp
w/flash
Here I have Follow Me On Glitter.  FMOG is a charcoal base with multicolored hex glitter and black and silver micro glitter.  Formula was great for a glitter.  It was nice and thin, but built up nicely with 2 coats.  I love the subtle multicolored glitter in this polish.  I decided to add a zebra print stamp since I've been neglecting my stamping sets :(


From l to r, 1 coat of Tinsel Town, 1 coat of Follow Me On Glitter,
2 coats of Tinsel Town, 2 coats of Follow Me On Glitter.
Above is China Glaze Tinsel Town compared to Follow Me On Glitter.  (Sorry for the bad pictures, my camera was about to die so I had to act quickly!)  Although they seem to look fairly similiar, there are some subtle differences.  The biggest difference to me, is the multicolored glitter in FMOT.  FMOT is also a bit darker than Tinsel Town.  As far as formula and application, I'd say FMOT has the uperhand.  FMOT is thinner, but builds up nicely in 2 coats.  Tinsel Town is thicker, but is easier to get full coverage in one coat.  Of the 2, I think Follow Me On Glitter is my favorite.  Either way, these are both gorgeous colors, and I'm happy to have both polishes. 
 
Thanks for stopping by!
 
  
K
Pin It
 

Ikat Inspired Mani

Hey guys!


Today I have a manicure that's inspired by Ikat prints. Ikat is a very intricate technique that is used to dye threads before weaving them into a textile. This process produces a tribal or tie dyed look, and can be found on everything from pillows to hand bags. Below are some examples of Ikat prints:


Ikat prints courtesy of http://www.designsponge.com/


While looking for some new mani ideas, I found some Ikat nail decals. I love the idea of nail decals, but I do my nails so often that I don't like spending money on decals, which can last for a couple of weeks. So, I decided to try to paint my own Ikat inspired nails. For this mani, I used OPI Fly, OPI Conquistadorable Color, and OPI Did It On Em'. First I applied my base coat, and 2 coast of Fly. After that was dry, I used Conquistadorable to paint on some random "blobs". The best thing about this mani, is you don't have to do it perfectly.


After that dried, I put smaller blobs of Did It On Em' inside the pink blobs. (I meant to take pictures after every step, but I kept forgetting!)


Using a black nail art brush, I made short brush strokes to outline the pink and green. You want this step to be "choppy" to look like the dye is running into the fabric.


Once you're done apply a top coat and you're finished! I love how this turned out, even though I could have done a neater job. This is a prefect nail art idea for a beginner, or someone who isn't confident in their nail art yet. It was super easy, and all it takes is polish and some patience.


Thanks for stopping by!


Pin It

Wednesday, February 15, 2012

OPI Designer Series Temptation

Hey guys!

Happy Valentine's Day! I was really excited to do a fun Vday mani, but time got away from me so I just did a simple pink mani. I didn't get a chance to take any pictures, but I used Pink Voltage from China Glaze. It was really just an excuse to wear a neon pink in the middle of Winter!  After I removed my Valentine's mani, I decided to try OPI DS Temptation, the one and only OPI Designer Series polish that I own.  I was so excited for this polish and couldn't wait to put it on.  Unfortunately, I was disappointed in this one.  In the past the DS polishes were holographic, which explained the price difference.  A regular bottle of OPI is about $8.50, the DS polishes are $12.50.  As pretty as this DS Temptation is, I don't think it's worth the price increase.  Anyway....onto the mani!


OPI DS Temptation
no flash with artificial light

w/flash

Temptation is a beautiful purple glitter, with teal and royal blue glitter mixed in.  Application on this was pretty bad.  It was very sheer and watery, then when I applied the second and third coats, it turned thick and goopy.  After 3 coats, I added a coat of Gelous and Seche Vite to smooth out the gritty finish.  In the end I love the color.  It's very rich and vibrant, and they definitely didn't skimp on the glitter.  Is it worth the extra money?  Probably not as far as quality goes.  But if you're a polish collector and lover, and you don't have a similar color, I'd say go for it since they are a limited edition. 


Thanks for stopping by!


K

Monday, February 13, 2012

OPI Super Bass Shatter and Save Me

Hey guys!

Today I have the top coat/effect polishes from the Nicki Minaj collection for OPI.  Below I have both polishes layered over the other polishes from this collection.

Layered with OPI Save Me
Here is one coat of OPI Save Me over (from left to right) Pink Friday, Did It On Em', Fly and Metallic 4 Life.  Below is 3 coats of Save Me on it's own.  Save Me is a clear base with silver micro glitter and blue/holographic bar glitter.  I have a ton of glitter polish in my collection, but nothing like this one!  Application was pretty good for a chunky glitter.  I will probably only use Save Me as a layering polish, since it's pretty hard to get full coverage with this one.

Save Me on its own
Next up is Super Bass Shatter over (from left to right) Pink Friday, Did It On Em', Fly and Metallic 4 Life.  Below is Super Bass over 3 coats of Save Me.  Super Bass is a shimmery purple shatter.  I love how it can take on so many different colors depending on what it's layered over.   Super Bass applied beautifully.  Alot of the other shatters seem to apply pretty thick, and the bottles seem to really thicken up.  After owning this for a month, and using it quite a bit, it's still perfect.  Like most shatters this does dry matte, so the pictures below show Super Bass without a top coat, and with a coat of Seche Vite.

Layered with Super Bass Shatter
no top coat

Layered with Super Bass Shatter
w/top coat

Save Me with a coat of Super Bass Shatter
w/top coat
I can definitely see how this was inspired by Nicki Minaj.  It's fun and funky, but not too crazy.  Overall I really enjoyed these polishes, and I think the colors are perfect for a Spring/Summer collection. 

Thanks for stopping by!

K

OPI Metallic 4 Life

Hey guys!


Today I have Metallic 4 Life, which is part of the Nicki Minaj collection for OPI.  I have to say this is the color I was most excited for.  And it did not disappoint!  Here is Metallic 4 Life with 2 coats followed by a coat of Gelous and Seche Vite.


OPI Metallic 4 Life
w/flash


w/flash


no flash with artificial light


Metallic 4 Life is a clear black base packed with black and silver micro glitter as well as larger silver hex glitter.  The formula was pretty thick, but a few  drops of polish thinner should help thin it out.  I ended up running out of polish thinner, so this mani was kind of a nightmare.  Please excuse the messy paint job!  Even though it was a pain, I love this polish.  It's dark and edgy, but subtle at the same time.  Definitely one of my favorite OPIs so far this year!

Thanks for stopping by!

K

Pin It

Thursday, February 9, 2012

OPI Did It On Em'

Hey guys!

Today I had planned on wearing Did It On Em' from the Nicki Minaj collection for OPI.  Unfortunately, I had a big girl meeting today, and I thought that lime green might be a little flashy.  Instead I went with OPI Time-less Is More, which is a really sheer off-white.  I normally don't do something so plain, but this poor polish has never been used, and it's a perfect meeting, interview and/or office appropriate color.  It's also perfect for a french manicure or as a base for a layering polish. 

OPI Time-less is More
w/flash
For Time-less is more I used 3 very thin coats. I learned the hard way that you cannot rush this polish. I did one coat, let that air dry completely and then did the other 2 coats followed by SV. 

Instead of redoing my nails, I just put Dit It On Em' over Time-less Is More.  Layering the polishes didn't effect the color of Did It On Em', so what you see is what the polish looks like on its own.  I also added Super Bass shatter on my accent nail.

OPI Did It On Em'
w/flash

OPI Did It On Em' with OPI Super Bass shatter
w/flash
Did It On Em' is a bright yellow-toned green creme.  The application on this one was ok.  It was a little thick and streaky, but I was able to pull it off in 2 coats.  Having a neutral color underneath the polish probably helped minimize the need for another layer.  As for whether or not I like this color....I'm not really sure.  I don't have a dupe in my collection, (it does look very similar to OPI Fiercely Fiona) so I'm glad I have it, but I don't know how often I'll wear it.  Maybe when Spring rolls around I'll warm up to it.

Thanks for stopping by!

K

Wednesday, February 8, 2012

Retro Pink Wednesday......with OPI Pink Friday!

Hey guys!


Today I have the mani that I'll be wearing for Pink Wednesday.  This is OPI Pink Friday from the Nicki Minaj collection.  I also decided to a black outline on my accent nail.  I first saw this technique on Tornado Calli's blog and thought it was really cute and had kind of a retro feel to it.


OPI Pink Friday w/flash


OPI Pink Friday
artificial light without flash
Pink Friday is a bubble gum pink creme.  I used 3 coats to cover up some streaks and bald spots.  Unfortunatly this didn't apply as well as the other cremes from this collection.  For the black outline, I used a nail art polish by Kiss and started by drawing a line down each side, then along the base of the nail as well as the tip of the nail to connect each side making a square.  Then I repeated the steps to thicken the lines and round out the edges.  Overall the outline was pretty easy, but next time I do it, I'll be sure to pick up a nail art pen to have a little more control over the lines. 


Teen Vogue has an awesome tutorial for this technique and includes a "Retro-Glam" mani.  I found this link after I did this mani, but I wish I had seen this first!  Check it out for a more indepth how-to.

Thanks for stopping by!

K

Pin It

Tuesday, February 7, 2012

OPI Fly with OPI Super Bass

Hey guys!

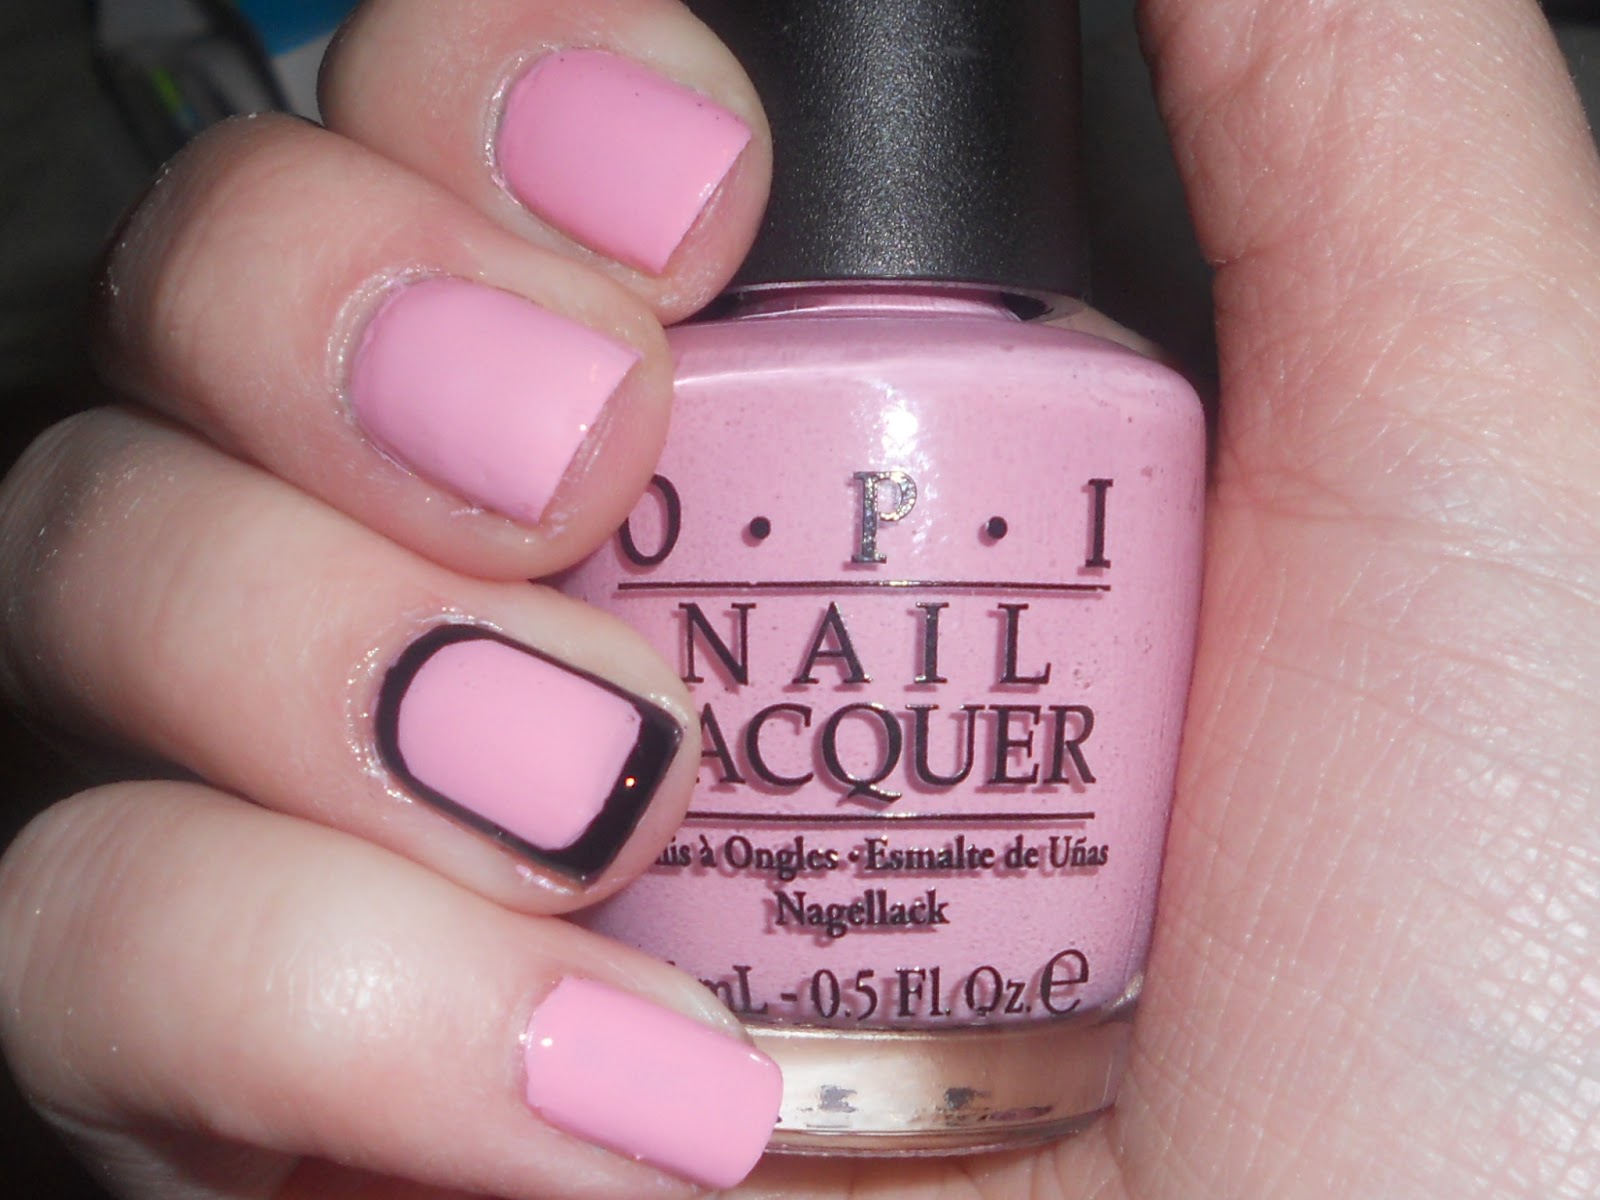
Today I have OPI Fly from the Nicki Minaj collection.  I was able to find the whole collection at JCPenney's last month.  I normally don't buy an entire collection, but this one only has 6 polishes, and the colors were all different enough, so I was able to justify it!  I started out with Fly, and added Super Bass shatter on my ring finger.

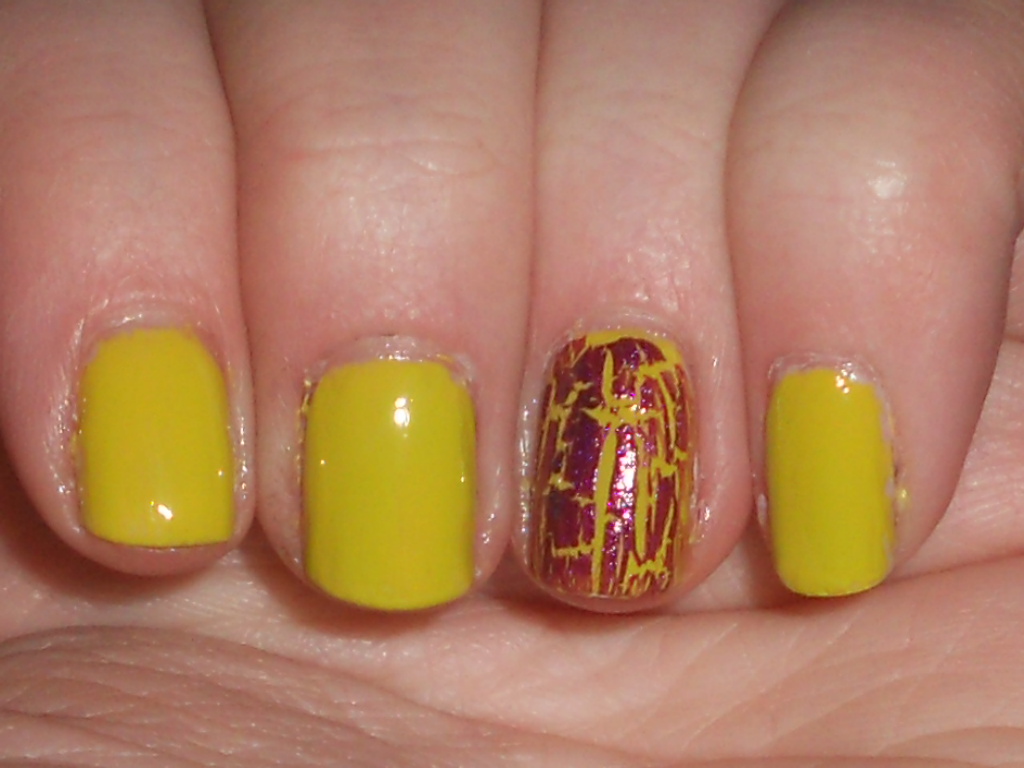
OPI Fly with OPI Super Bass on accent finger

With OPI Super Bass
Fly is a rich aqua/teal creme polish.  Application was 100% perfect.  I used 2 coats to cover up some bald spots, but you could probably get away with one coat.  I was going to leave this mani alone, but I decided to add Super Bass on one finger.  Super Bass is a purple/magenta shatter with a bit of shimmer.  I'm over the whole shatter look, but this one was too pretty not to pick up.  (Hint: Before I applied Super Bass, I put a coat of Seche Vite over Fly.  When  you use a Shatter, it tends to dull the base color if you don't use a top coat.)  Super Bass applied very well for a shatter.  It does dry matte, but I prefer it with a glossy finish.  So after Super Bass dried and was done "shattering" I applied a coat of Seche Vite.  Once you apply a top coat, you can really see the shimmer in Super Bass.  Plus, it really pops over Fly.  The more I look at it, the more I want to add Super Bass to the rest of this mani.  This will definitely be a top Spring/Summer combo!

I will have the rest of this collection throughout the week.

Thanks for stopping by!

K

Pin It

Friday, February 3, 2012

China Glaze Agent Lavender and OPI Servin' Up Sparkle

Hey guys!

The mani I have today was kind of an accident. I planned on doing a half moon mani, so I started with Sinful Colors Snow Me White.....but it ended up taking me 3 coats to cover all of the streaks and ended up being a goopy mess. So, I decided to put a coat of China Glaze Agent Lavender over the white. Then I added OPI Servin' Up Sparkle to do a glitter gradient mani. I really like it and it saved me from having to completely start over!


China Glaze Agent Lavender and OPI Servin' Up Sparkle
w/flash

no flash with artificial light
Thanks for stopping by!

K


Pin It

Thursday, February 2, 2012

Hello Kitty!

Hey guys!

Today I have a Hello Kitty mani I did tonight.  I got the idea from my sister, who had seen someone with a similar design.  This is the first time I've ever tried painting something so detailed, even though it's not really that detailed.  I used the following for this mani:
  • 2 coats of OPI Pink Friday from the Nicki Minaj collection
  • Sally Hansen Complete Salon Manicure in Lavender Cloud for the face
  • Sinful Black on Black for the outline, eyes, whiskers and polka dots
  • Revlon Top Speed Fast Dry Nail Enamel in Electric for the nose
  • China Glaze Fuchsia Fanatic from the Electropop collection for the bow

(L-R) Revlon Electric, SH Lavender Cloud, Sinful Black on Black, OPI Pink Friday, CG Fuchsia Fanatic 

I wanted to take photos for a step by step tutorial, but I ended up remembering half way through. I plan on doing a tutorial after some more practice.  Here is what I came up with.


I was going to take some more pictures of her face, but I messed her up when I tried fixing the eyes.  I tend to be a perfectionist when it comes to my nails.....but I ended up making it worse!  Overall I think it's a cute mani, but it's not really for me.

Thanks for stopping by!

K

Polka Dot Fun!

Hey guys!

Today I have a really easy and fun mani I did for Pink Wednesday.  For the base I used Sally Hansen Complete Salon Manicure in Lavender Cloud.  Personally, I don't see any lavender in this polish.  I bought it because I love the look of a white mani, but if it's too white, it washes out my skin.  This polish is what I call "dirty white".  It applies pretty well for a near white, I used 2 coats to get rid of any streaks.  For the dots I used China Glaze Shocking Pink which is a neon, and Sinful Colors Black on Black.  To make the polka dots, I just used the round end of a bobby pin.  They do make dotting tools, but I usually use a bobby pin, the head of a sewing pin, or the tip of a lead pencil.


I love it!  It's nice and Springy....and it was super simple to do.  If you're new to nail art, or don't have the steadiest hand, I suggest trying this one out.

Thanks for stopping by!

K